How to Create an Outstanding Airbnb Listing
Creating a listing on Airbnb is the first essential step for every vacation rental host. Although some hosts utilize their own direct booking sites, the role of OTAs is crucial for maintaining a constant influx of bookings.
Vacation rental sites such as Airbnb and Booking.com alike have earned the trust of countless travelers and continue to be some of the most popular platforms when it comes to renting a vacation home. In fact, more than 90% of bookings take place on the top OTAs nowadays.
If you are eager to create your first property page on Airbnb or optimize your current listings for additional bookings, explore our guidelines below.
[lwptoc min=”1″ depth=”1″ hierarchical=”0″ numeration=”none” numerationSuffix=”dot” title=”” toggle=”0″ labelShow=”show” labelHide=”hide” smoothScroll=”1″ smoothScrollOffset=”30″ width=”600%” titleFontSize=”120%” titleFontWeight=”extrabold” itemsFontSize=”120%” colorScheme=”inherit” skipHeadingText=”Conclusion”]
1. Set Up Your Airbnb Listing
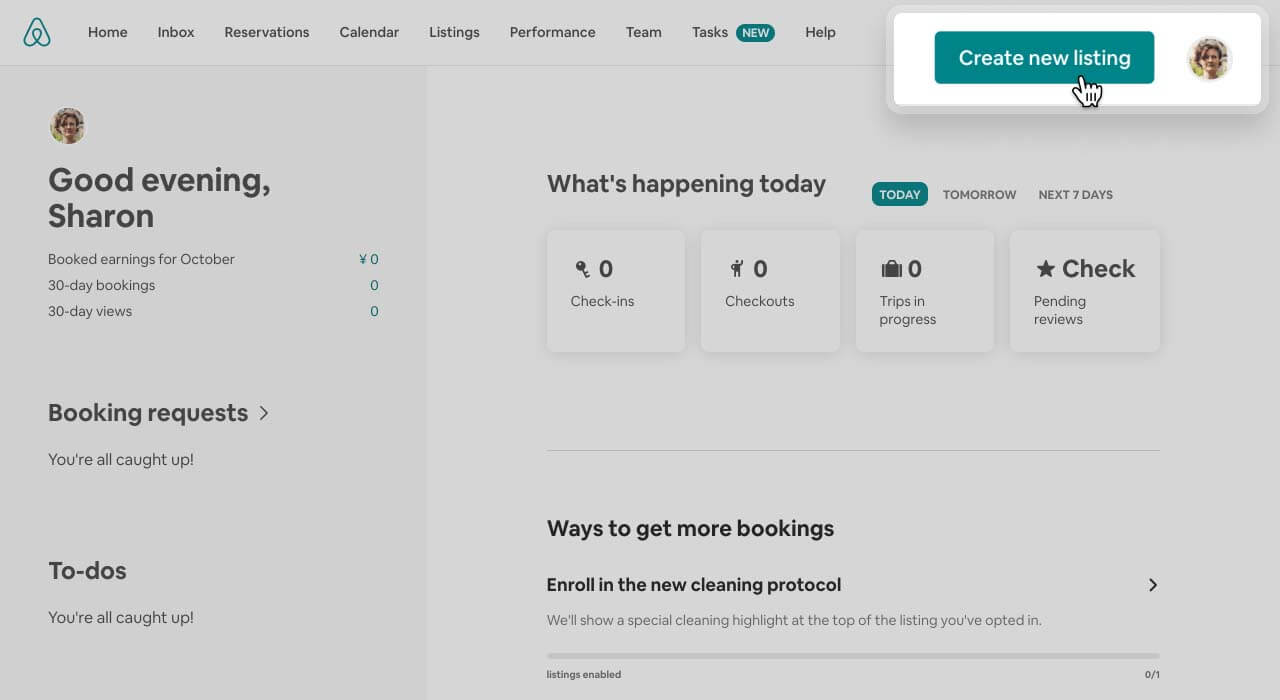
To set up a listing for your property, go to Airbnb.com and click the “Create New Listing” button in the upper right corner. You will then see a form asking you to provide the following information about your rental:
- Property type. You should select one of the options suggested by Airbnb: “Entire place,” “Private room,” or “Shared room.” When choosing “Entire place,” keep in mind that this option means granting full access to your property and all its areas. If you select the “Private room” option, in addition to a separate room to sleep in, guests might have access to the common areas of your property as well (such as a shared living room or a kitchen).
- The number of guests. Your task is to provide a comfortable stay. So, think carefully about how many people your Airbnb rental can accommodate. Select the number of beds or other sleeping arrangements that your property offers.
- Location. Pin the exact location of your vacation rental on Airbnb’s map. Only confirmed guests will be able to see the instructions on how to get to your property.
- Amenities. Select the essential amenities that are available at your rental. After you publish your property page, you will be able to add more amenities that you provide to your guests. Be sure your property page features all the amenities that you offer. For instance, if you provide a self-check-in option or a free parking spot, specify them in your amenities list so that users can easily filter for them when searching for a property to book.
- Spaces that guests can use. Tick off all the areas and rooms that will be at guests’ disposal during their stay. The entire space of your vacation rental should really be available
- Property description and title. Your property page will look incomplete without a comprehensive property description. Instead of stating the dry facts, get creative, and describe the experience your guests will have if they book your short-term rental property. Your Airbnb title should be eye-catching and descriptive and highlight your unique selling points (e.g., an ocean view, free parking, outdoor area with a bbq, etc.)
- Photos. It is time to take beautiful pictures of your vacation rental and add them to your listing. Continue reading to find out how to create pictures that will set your property page apart.
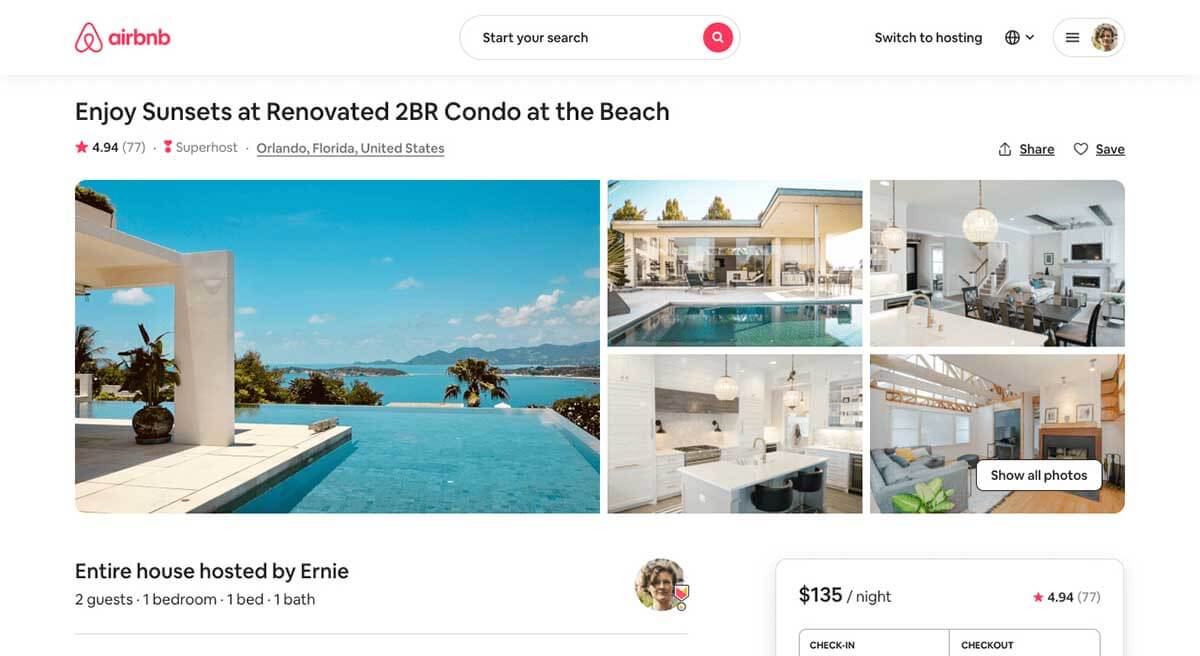
2. Take Great Pictures of Your Rental
Photos are the first thing that guests pay attention to when searching for a property to stay in. This is why investing in fabulous pictures is key to boosting the number of your bookings.
Your property photos should be high-quality photos and they need to showcase the distinct style and character of your property. Adding small touches can highlight the coziness and elegance of your short-term rental, and create the desired vibe. Other Airbnb hosts might use a couple of decorative pillows and a throw blanket will cozy up your living room and add a splash of color and pattern.
To refresh the interior of a dining room, lay the table and put a vase of flowers. In a nutshell, your property page photos should demonstrate what kind of experience your guests can expect if they book with you.
Needless to say, property photos should be of high quality and consistent style. Chances are, you will opt for professional photography services to make sure your photos will stand out. But if you have an eye for photography, you can take beautiful pictures yourself just using your smartphone.
Make sure to enable the grid setting on your smartphone for a balanced composition and take pictures on a sunny day. To edit your photos and do light retouching, you can also use mobile apps such as Lightroom, Snapseed, or VSCO. Along with uploading the property photos, add a couple of pictures of nearby landmarks and the street on which your rental is located. This will help potential guests to visualize their stay.
Remember to add a picture of each room to your Airbnb listing, including photos of your most exclusive amenities.
3. Highlight Your Selling Points But Be Honest About Downsides
While creating a property page, every host should be a bit of a marketer. Your strategy should start with identifying your target guest. Then you need to define unique selling points that might attract this guest to book with you.
For instance, people who work from home will search for a comfortable workplace and stable Wi-Fi. Staycationers traveling by car will search for accommodation with a free parking spot. Families will limit their search to kid-friendly accommodation options. Once you have decided on your target guest, highlight your key selling points in your rental photos, description, and title.
Although it might be tempting to focus only on the advantages of your property to stand out among other local Airbnb hosts, you should remain transparent about its downsides.
Is your Airbnb property located in a busy tourist area? Or is it a part of an older building? Make sure to add these characteristics to your property description.
For example, a busy area can be seen as a benefit for some guests who enjoy lively streets and nightlife. And vintage fans will enjoy staying at an older property.
4. List Your House Rules
The next step in creating your listing is to set house rules for your guests. Select the rules that apply to your property from the list suggested by Airbnb.
The platform recognizes the possibility that each host might have their own property rules. Make sure to add extra rules that your guests will need to abide by.
If there are some characteristics of your home that guests should know about, you can make them clear by selecting the ones that apply to your rental from the following list:

5. Set Availability and Pricing
Before you start accepting your first guests, you should decide how often you’d like to rent out your property, how much notice you will require before your guests arrive, and also set your minimum and maximum stay requirements.
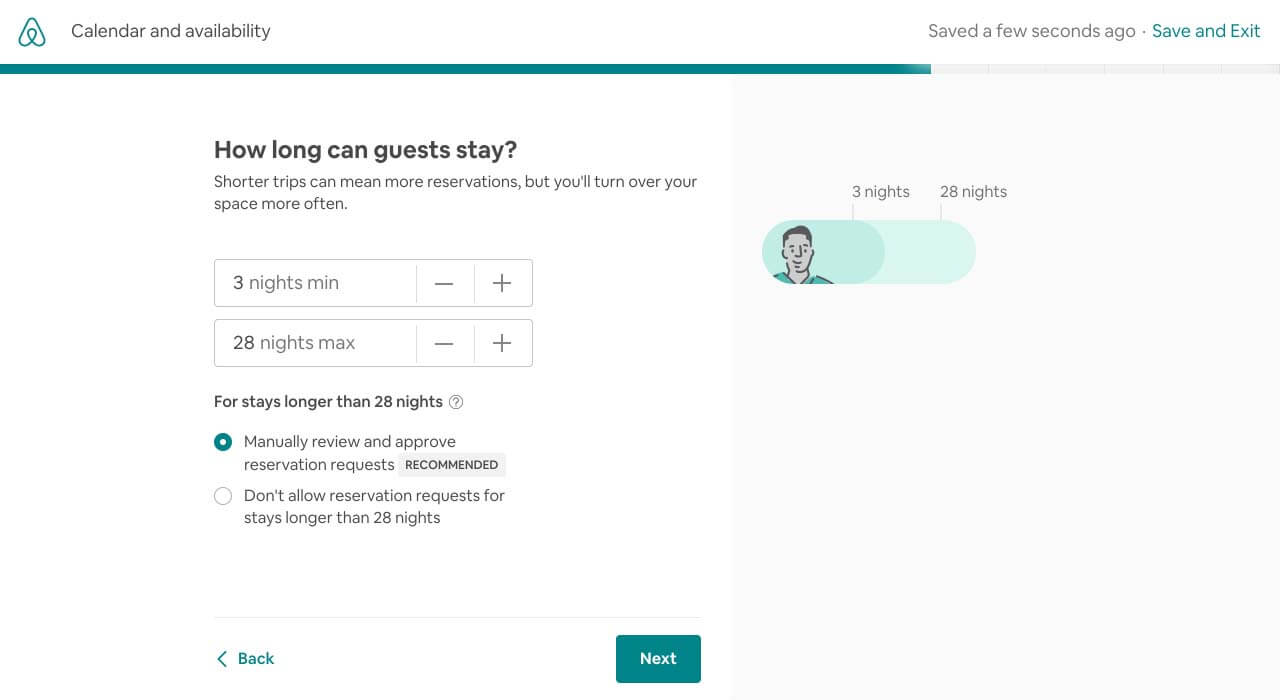
1. Set up your minimum and maximum stay requirements
The minimum night stay requirement determines the minimum number of nights guests can stay at your property. While allowing one-night stays could mean higher booking rates for your Airbnb listing, it may attract unreliable guests. Rentals with a one-night stay requirement are at risk of turning into a party house.
On top of that, one-night stays bring more hassle and more work for a host. You should keep your property in tip-top condition all the time. However, it turns into a challenge with a high guest turnover.
Therefore, most hosts opt for a three-night setting. It helps maintain a good occupancy rate and gets bookings from trustworthy guests.
When it comes to setting the maximum stay requirement, it is imperative to check the local regulations first. In some areas, Airbnb stays that are longer than 28 days may be prohibited, while in other cities special legal regulations will apply. A long-term guest might be viewed as a tenant by law, and landlord/tenant regulations will then be applied.
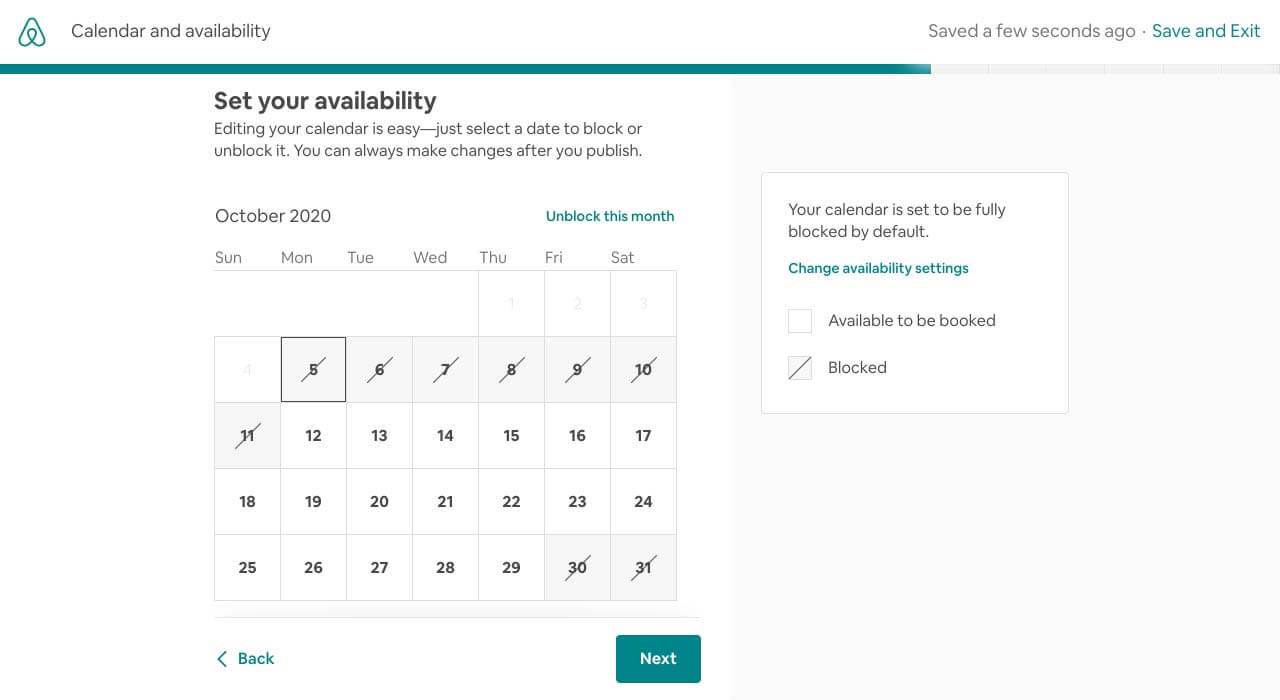
2. Change availability settings
The next step in your listing creation is to set availability in your booking calendar.
You can block and unblock separate days and even entire months. Keeping your calendar up-to-date is vital for receiving bookings and avoiding double bookings. If you handle multiple properties on various vacation rental sites, managing the availability of your rentals might become a real headache.
Luckily, vacation rental software like iGMS can come to your rescue by enabling you to sync all your bookings from multiple platforms and manage them in real time from a single interface.
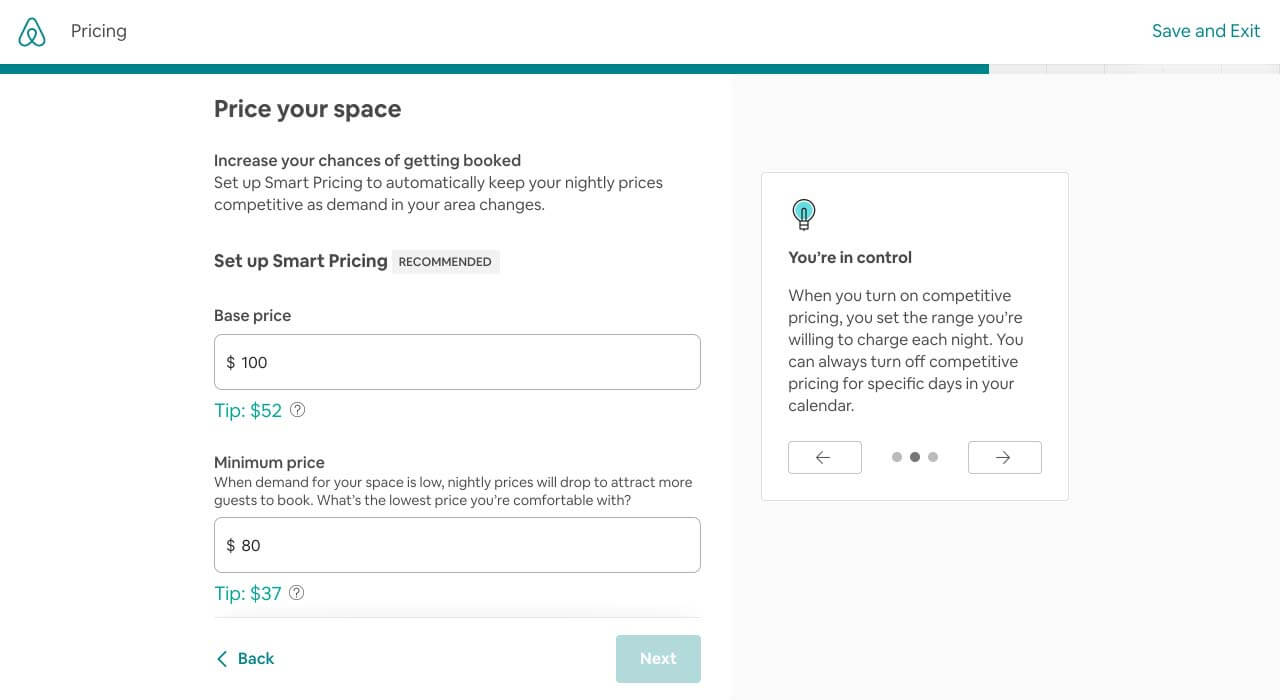
3. Set up your pricing
Although Airbnb will recommend that you use Smart Pricing, it’s better to do your research before you price your rental. Compare similar properties in your area and use an Airbnb host calculator to identify the best price for your property.
To make the most out of your property, you should change your pricing in accordance with factors such as seasonality, events in your area, or price fluctuations on the market. This will help you optimize your strategy for maximum revenue.
To attract initial bookings, add a discount for your first guests. Airbnb will put your listing higher in the search results, ensuring a smooth start for you on the platform.
To encourage longer stays and reduce guest turnover, you can set weekly and monthly discounts. Your weekly discount will apply to reservations for 7-27 nights. Your monthly discount will come into action for reservations for 28 nights or longer.
To adjust your monthly and weekly discounts, go to the Pricing setting for your listing, and next to Length-of-stay discounts, click Edit. Specify your discount and click Save.
If you have multiple Airbnb listings, you can make use of rule sets to manage availability and pricing. When it comes to pricing, you can add the following rules to your rule set:
- Nightly price: Adjust the nightly rate based on the time of year. For example, you can increase your nightly rate by 15% for the holiday season.
- Length-of-stay discounts: Offer guests a discount for booking longer stays. You can add weekly, monthly discounts or select any other timeframe.
- Last-minute discounts: Reduce your pricing as the check-in date gets closer.
- Early-bird discounts: Provide a discount for booking much further in advance.
By introducing discounts to your strategy, you can boost your occupancy. As guests usually search for the best value for money, a discounted option will generate more interest.
Get savvier with pricing by reading our Airbnb pricing master class summary:
6. Make the Final Adjustments to Your Airbnb Listing
Once you have published your listing, you can adjust additional settings.
-
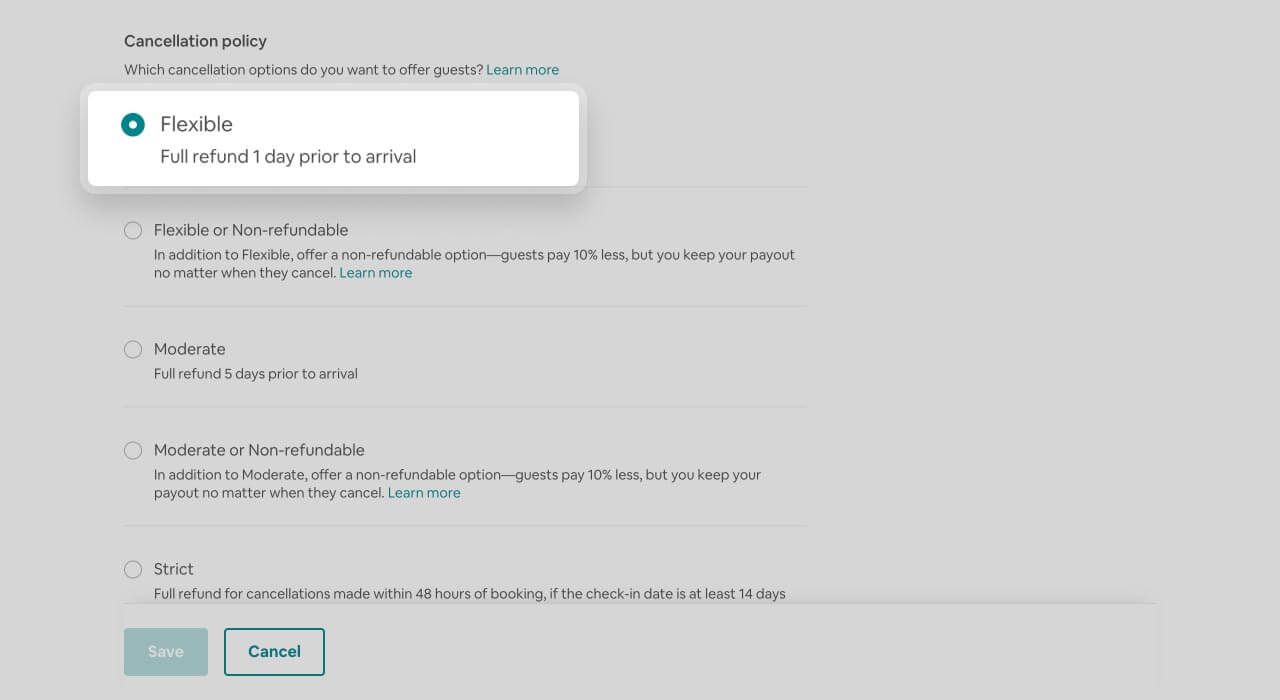
Cancellation policy
To select a cancellation policy, go to Your Listings and select the necessary listing. Then go to Booking Settings and click Edit next to Policies.
You will be able to choose from the following policies: Flexible, Moderate, or Strict. To optimize their properties for more bookings, hosts and vacation rental homeowners avoid a Strict cancellation policy as it can put guests off. When you are starting your hosting journey, sticking to a Flexible cancellation policy is crucial for receiving initial bookings. This policy is the most attractive to travelers as it offers the most lenient refund options for guests.
Airbnb also recommends choosing a Flexible cancellation policy to get more reservations during the COVID-19 pandemic. Guests’ travel plans might change unexpectedly if new restrictions are introduced in their country or city. Offering an option to cancel for free will have a positive impact on your occupancy rate and help to sustain revenue.
-
Additional fees
In order not to go into the red and make sure their revenue can cover expenses, hosts can add extra charges to their Airbnb property. To do so, go to your listing and click Pricing at the top of the page.
Then next to Extra charges, click the Edit option. Here you will be able to set your cleaning fee and extra guests fee, as well as indicate the amount of a security deposit.
Although Airbnb Host Guarantee protects your property, it comes in handy only in “rare instances of damage.” A security deposit comes into play in case of minor damage that occurred during your guests’ stay at your property (e.g., broken wine glasses, or a huge stain on your expensive carpet). Make sure that the amount of your security deposit doesn’t exceed 20% of the total cost of the booking. Otherwise, it can deter people from booking with you.
-
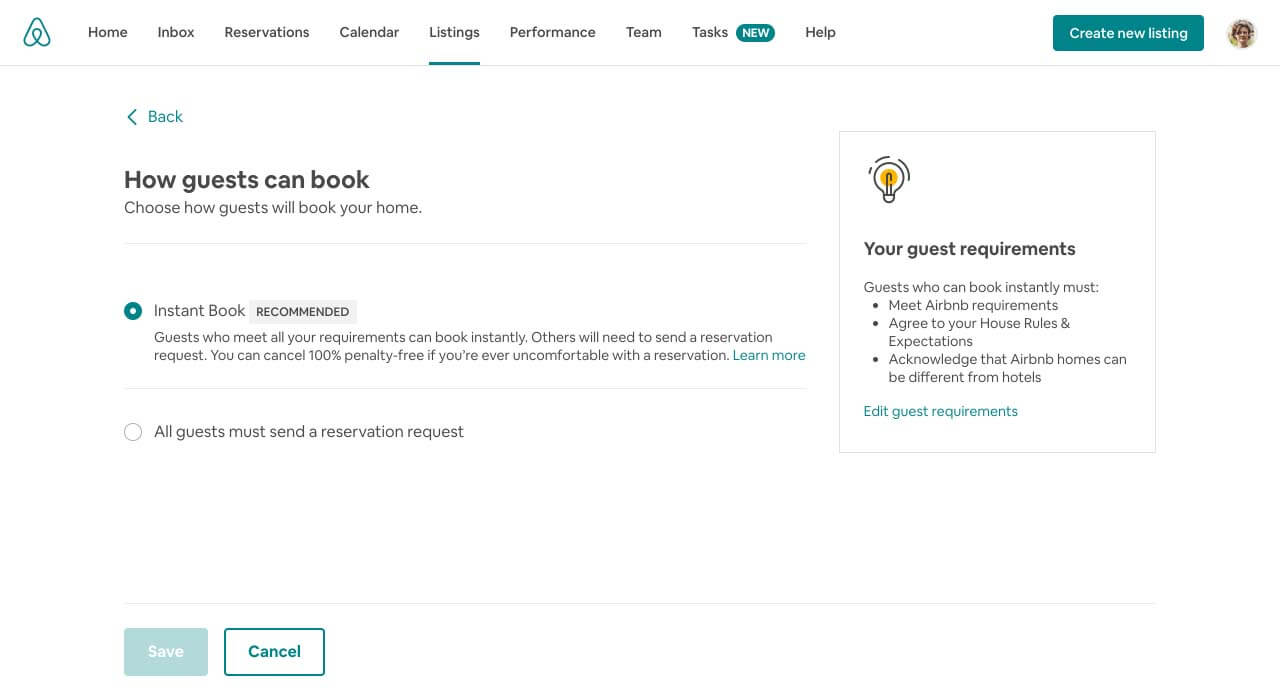
Instant Book
Instant Book is a setting that allows guests to book with you without your prior approval. By default, this setting is turned on so guests can book your new property instantly. To turn off this setting, go to the Booking Settings for your listing and select All guests must send reservation requests.
7. Refine Your Airbnb Account
After you have completed all the steps above, it is time to polish your personal Airbnb profile. The use of data is governed by the Airbnb Privacy Policy so you can rest assured that your personal information is protected.
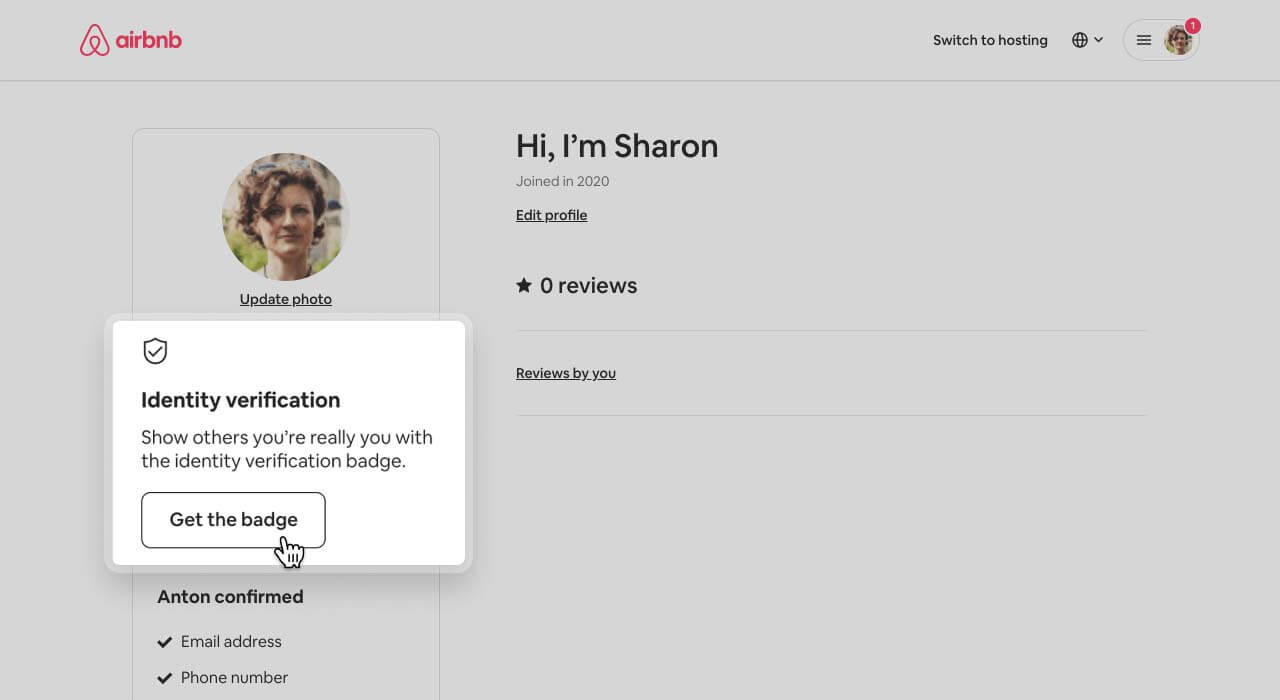
It is essential to fill in all the sections of your Airbnb bio and add a professional photo of yourself. Select one where your face is fully visible and you look positive and approachable (your Linkedin photo would be the best option).
To help guests learn about you as a host, take some time to compose a comprehensive description of yourself. Describe your exceptional style of hosting and include a few personal details (countries you’ve been to, your hobbies, why you decided to become a host, etc.)
To eliminate fake listing scams, Airbnb will ask you also to add verifications. There are several options to verify your Airbnb profile:
- Take a photo of your ID (a driver’s license, passport, or national identity card) with your smartphone or a camera on your laptop
- Upload an existing photo of your ID
- Add your legal first and last name
- Specify your legal address (it should match your billing address).
The rule of thumb is to provide all of them as this will help your profile look more reliable and authentic. By completing your profile and providing the necessary verifications, you can alleviate guest fears about booking with a stranger.
Is It Free to List on Airbnb?
Creating a listing on Airbnb is entirely free but, as a host, you will be charged a service fee per booking.
Currently, there are two fee structures on Airbnb: a split fee or a host-only fee. A split fee is a fee where both a host and a guest pay a service fee. A host service fee ranges between 3% and 5% depending on the country and cancelation policy. A guest will be charged a 14.2% service fee of the booking subtotal.
Another fee model is applicable to hosts in the Asia Pacific region (except Japan), Europe, the Middle East, and Africa who register with the platform starting June 4, 2019. They should pay a 14% host-only fee by default.
In Greece and Croatia, the host-only fee model is mandatory starting from September 1, 2020.
How Do I Get My Listing Higher on Airbnb?
To ensure that your listing remains visible to potential guests, you should constantly work on improving your Airbnb ranking. Here are several strategies that will help your listing to break through the noise.
1. Keep an Eye on Your Response Rate and Response Time
Airbnb appreciates hosts who pay due attention to their communication with guests. To evaluate your communication with guests, Airbnb measures your response rate and time. The response rate is the percentage of inquiries you have managed to respond to in 24 hours.
The response time, on the other hand, shows how long it takes you to respond. To maintain a high position in search results for your listing, you should keep your response rate higher than 90%. With regard to the response time, you should be as prompt as possible.
A simple life hack is to convert your standard messages into templates. This way, you will be able to improve your response time and reply to a greater number of messages. You can also start using software to help you with messaging. For example, vacation rental software such as iGMS will help set up templates and send automated replies at preset dates and times.
2. Get More Five-Star Reviews
Your positive reviews are a signal to Airbnb that you are a great host who provides an excellent guest experience. To reward such hosts, Airbnb will move their listings to the top of the search results. Also, five-star reviews are necessary for obtaining a Superhost status.
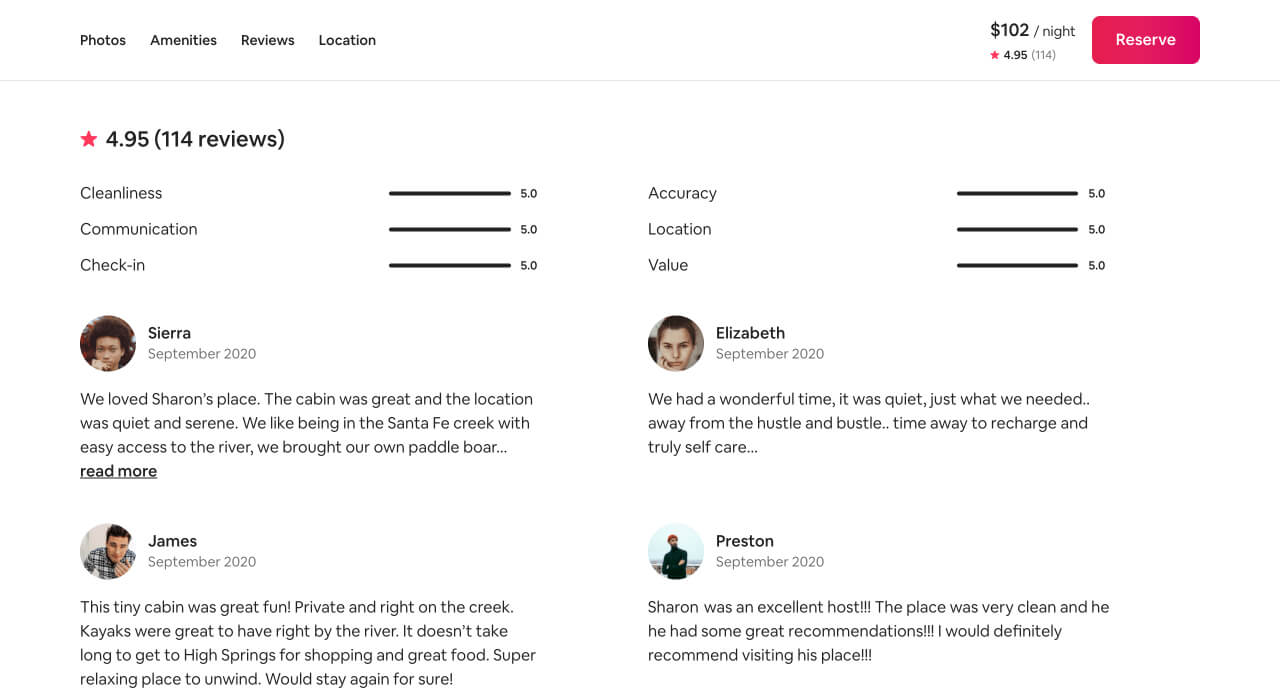
However, ensuring a great stay for your guests is not enough to receive a glowing review. To encourage your guests to review their stay at your property, ask them to leave you a review in your post-departure email. You can also review your guests first, and Airbnb will prompt your guests to review you in return.
3. Use Instant Book
If you turn on Instant Book for your listing, you can get a higher position in the search results. The platform strives to remove any obstacles that may deter guests from making a booking.
As Instant Book enables guests to book without a host’s approval, guests can just choose their dates and then discuss check-in arrangements with a host. This functionality simplifies the booking process for guests and helps hosts to land more reservations.
4. Promote Your Listing on Social Media
As property page views are of great importance for improving your ranking, you should do your best to market your rental adequately. If your listing gets views, Airbnb considers it to be popular among travelers and gives it even more of a boost.
Promoting your rental on social media can help you draw more eyes to your page. Visual platforms such as Instagram and Pinterest would be your best choice. Both social media networks are image-based and are the best places to share pictures of your vacation rental. Using these platforms, you can showcase your rental’s interior design and create engaging posts about your area and things to do. This way, you will be able to reach thousands of users and drive views to your listing.
5. Automate Your Vacation Rental Management
To improve multiple aspects of your Airbnb listings and streamline daily operations, more and more hosts opt for automation. Vacation rental software such as iGMS can enhance your listing management by automating your hosting tasks which will result in an improved ranking on Airbnb. Using iGMS, you will gain access to the following features:
- Managing multiple accounts and listings on the top OTAs from a single interface
- Synchronizing reservations across multiple platforms to eliminate the risk of double bookings
- Organizing messages into a single feed with a unified inbox
- Improving communication with automated templates and triggered messaging
- Creating and coordinating cleaning tasks with live tracking to completion
- Creating your own direct booking website
- Managing direct bookings using a direct booking management toolkit
- Processing payments securely via integration with Stripe.
- Creating essential reports on your business results within minutes
- Adjusting your pricing in a smart way through integrations with PriceLabs, DPGO, and Wheelhouse
- Automating the process of guest reviews
You can create Airbnb listings and listings on other OTAs directly via iGMS. On top of that, you will be able to manage all the activities associated with short-term rental management within a single iGMS dashboard.

Conclusion
As competition in the vacation rental industry is intense, dedicating some time to build an outstanding Airbnb property page will help you be ahead of the game. A complete listing with nice-looking photos and comprehensive information about you as a host is key to attracting more reservations.
Enhancing your ranking on the platform is another aspect to work on continuously. Be sure to explore various optimization techniques and review your page over time if you make adjustments to your property. Go the extra mile to provide an excellent guest experience and elevate your property management by using automation. This will allow for an increased occupancy rate and, hence, for the best ROI.

![Your Monthly iGMS Roundup [February 2020]](/content/images/size/w600/wordpress/2020/02/igms-roundup-feb-2020-cover.png)